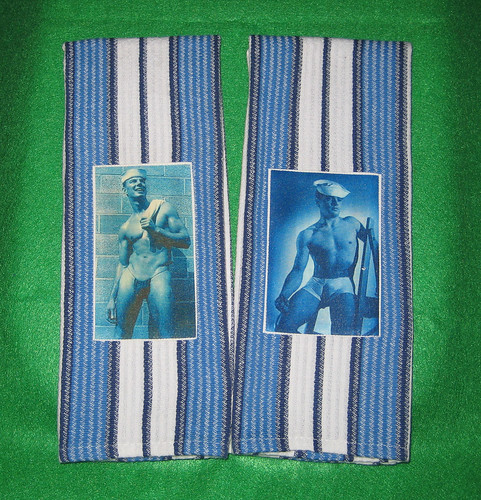
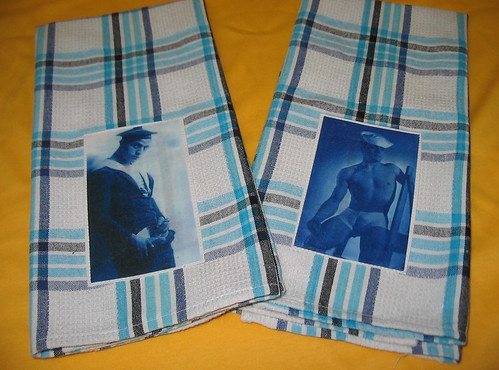
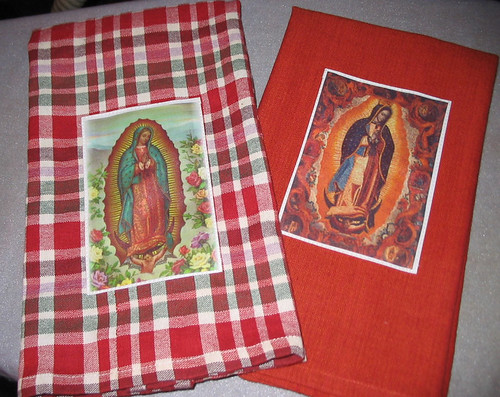
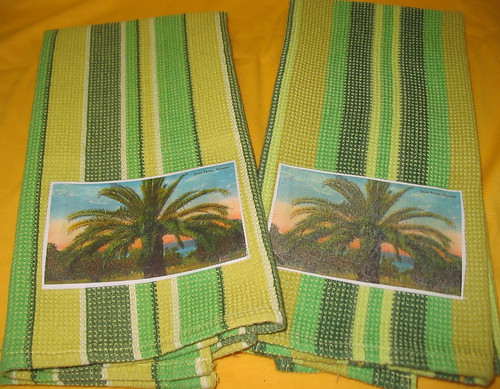
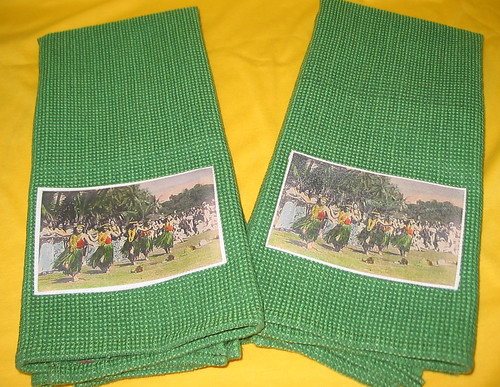
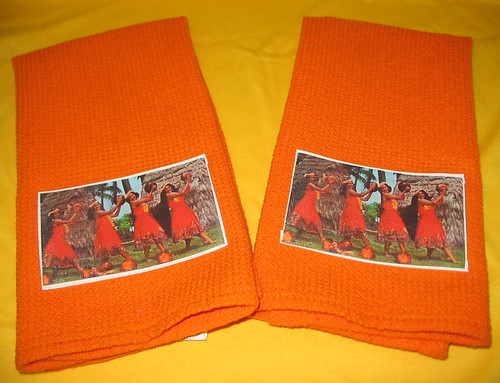
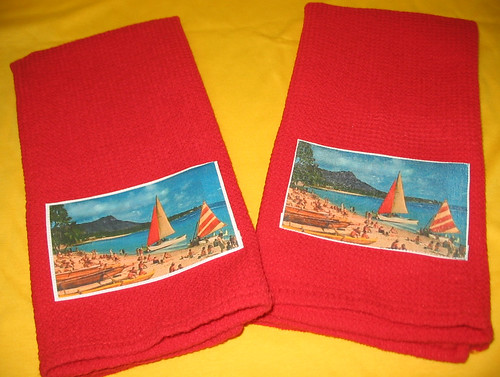
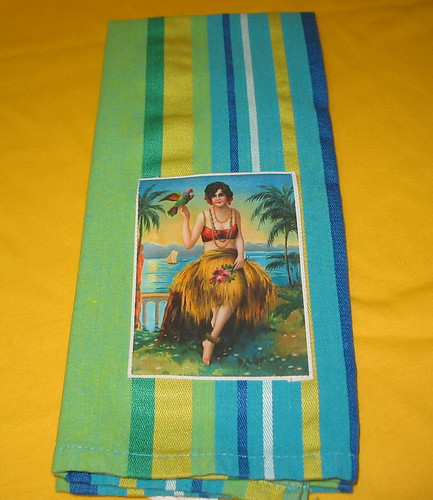
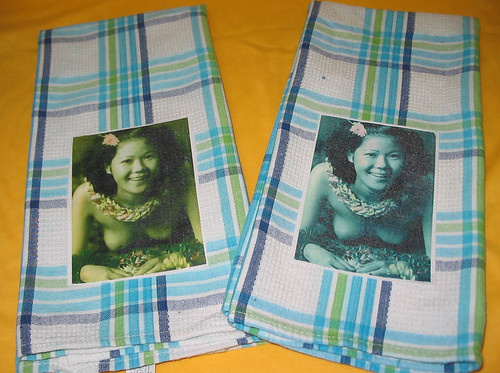
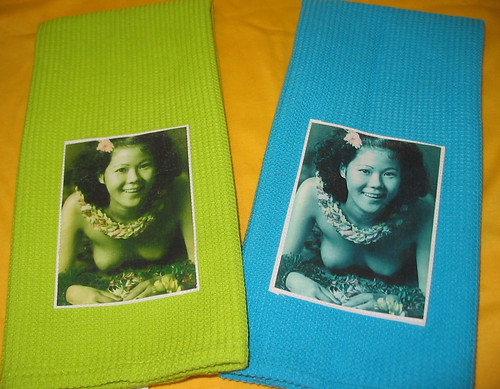
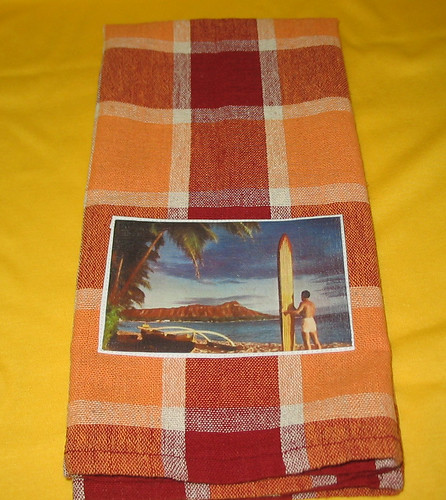
Monday, April 27, 2009

chunky houses!

i was in the first round of the chunky house swap on craftster.org, and then i missed out on round 2 because i was already in too many other swaps. i signed up for round 3, thinking that i'd do similar houses to the ones i made for round 1.

then i took the micheal demeng classes, and changed my mind entirely! i got really inspired by the paint layering we did in the class, and decided to play with that a bit instead.

i used sturdy chipboard houses that i bought at micheals in the $1.50 area. they're made by crayola, and are strung together on a binder ring. i separated them and trimmed them down a bit to fit within the swap guidelines, and went at it!

blue doily
vintage wallpaper base painted with payne's grey, vintage doily, stamps, painted cocktail sword, number ephemera

green
layer of kroma cackle over gesso, then a wash of golden pthalo green and then a layer of golden interference green. vintage craft leaf painted pthalo, vintage earring and bingo chips glued on.

this one i didn't end up sending. i don't like it nearly as much, the copper in the right corner bothers me. luckily i'd misremembered how many i had to make, so i didn't need it! i want to pry the copper coloured thing off and redo that corner.
brass
golden molding paste used with punchinella for the top

copper
golden molding paste used with punchinella for the bottom and textured for the upper. brushed with a wash of micaseous iron oxide paint

blue
golden molding paste used with punchinella for the bottom various ephemera including vintage cardboard bingo chip. dry brushed with interference blue

i love how they turned out! they took longer than just collage because each layer needed to dry, but the end result was definitely worth it. i'm really loving the golden molding paste and liquid paints!

Sunday, April 26, 2009

i'm back! and volunteering, among other things!

sorry for the extended radio silence folks!

again, health issues were a big part of it. i've just been so up and down the last few months, i almost preferred it when my health was consistently worse! not really, of course, but some days it gets discouraging.
(for those of you who read my blog who don't know me in "real life" or who aren't close friends, i have fibromyalgia and chronic fatique. i've had it for a long time, but it's been disabling the last few years after a car accident)

i've had lots of stuff that i've wanted to post about, but i never seem to have the energy to actually post it.

so, things i've been up to-

- i went on a cleaning rampage over easter weekend, as i had the house to myself. this is the closest to clean and organized that my studio have ever been, really that ANY of my studios have ever been, and it's super exciting! of course, i paid for the cleaning binge for almost a week after...

- i was determined to get out of the house and go to swap-o-rama-rama, a clothing and craft supply swap. i'll do a post about it later, when i finally get a chance to work with some of the goodies that i scored, but in the meantime, definitely check out the post (complete with pics!) on the got craft? blog. i lasted for about an hour and a half before my hips seized up, but it was totally worth feeling crappy for it! it would have been even more fun with a friend, but i didn't have the energy to be social AND search for cool finds!

- all of my chunky houses for the Chunky House Swap Round 3 on craftster.org have been received, so i can post pics! i had a lot of fun with them.

- my pendants are being received for the Pendant Swap on craftster.org, and i'm super impatient, i want to post them!!

- my atcs for the Fabric ATC Swap Round 4 that i hosted on craftster.org are currently winging their way around the world. i sent them canada post instead of USPS, so they're gonna be way slower.

- i've been machine embroidering! i've been buying patterns from urban threads and from embroidery library, as well as digitizing my own designs.

- i've got some fabulous thrift store finds to get photographed and posted, i've made some great scores lately!

- i'm obsessed with twitter. really. it's just so easy to keep up with! follow me on twitter!

- i won books from craftychica!

- after freaking out over the state of my finances, i finally started working on stuff for my etsy shop again! the poor shop's been so neglected since everyone started having babies! AND, i've started weeding through my stash, and i'm hoping to open a second shop with supplies and vintage goodies, since god knows i have enough of both!

- i've obviously failed at Make Something Cool Every Day April (MSCEApril), but i have made some cool stuff, so i'll have to post them. the pics below count too!

- i've been volunteering! it started out as part of my disability company's "get amy back to work" campaign, they wanted me to volunteer somewhere, basically to get me out of the house! i looked around for opportunities and found some really cool ones, but most were either totally inappropriate for me (really physical, etc), were ones that require a long criminal record check (and the disability company wanted me to start RIGHT AWAY), or they wanted long time commitments, which i didn't feel comfortable with, because i don't know what'll be going on in my life in 6 months, so i don't want to agree to volunteer every wednesday morning for a year or something when i know i wouldn't be able to do it once i'm back at work.

i was starting to get a bit discouraged. i've done a ton of volunteer work over the years, mostly political based, but all the groups i've worked with were in vancouver. i loved working with them, and one day i'd like to be able to do HIV/AIDS education work again, but i needed something local. and then i found Caring Hearts!

Caring Hearts is an organization that provides handmade clothing and blankets/afghans to children in crisis.

from their website -
Caring Hearts has hundreds of volunteers donating their time and skills to make clothing, blankets and quilts for children in sizes that range from newborn to teenagers. We provide clothing for all seasons and distribute our finished items throughout the year to many community programs in all areas of the lower mainland.Our volunteers create the hand crafted items in their own homes on their own time.

Caring Hearts is helping reduce the trauma for children in crisis, who become placed in difficult situations by giving them hand made items. These items may be the first article that was ever made ... just for them. Imagine the feeling of knowing that someone you haven't even met, did this for you! This is where your charitable contributions have the greatest social effect. Since a child's self esteem and sense of worth ultimately effects their social attitudes, giving them both pride and comfort, can produce enormous long-term rewards for our community and society at large.


i go in once a week and help put together the bundles of "orders" from the different community groups that request items, and i've started sewing for them as well. we have lots of knitting and crocheting volunteers, but we're short on sewing, so i've been focusing mostly on the stuff that we're lowest on. i've done a bunch of 2T stuff, and we're really low on jackets/hoodies for all ages, so i'm going to do some of those next.

the first things i made -

a little boy's outfit (caring hearts is really into binary gender. it's been a little weird for me, quite frankly!)
2T outfit
all the fabric is donated to the charity, and the size of the pieces can vary quite a lot. i didn't realize quite how small these pieces were when i took them home with me! i barely had enough, hence the mismatched cuffs on the pants!

and little girl's outfits (again, misjudged the size of the pieces, these two were much bigger than i realized!)
pink shirts

flowery shirts

white shirt

pants

pants

i gave up entirely on basting ruffles, and just cut strips of fabric and used my ruffle foot. much much faster!


and these i finished up last week. the fabric for these were actually from my stash. i got it from a friend on new year's day, thinking it would make cute bags, but didn't realize that it had stretch in it. perfect for little kid clothes!
IMG_9608

IMG_9597

IMG_9596

it's been fun to just whip stuff up, without struggling with fabrics, or trying to do something quirky that requires a lot of thought. i just kind of zone out, and it's good.

Sunday, April 12, 2009

amazon fail

this isn't particularly crafty (though i do have an idea for an embroidery piece...), but it's definitely an issue very dear to my heart (and other parts of my body!). amazon has changed their ranking policy to SAVE THE CHILDREN (sarcasm) by removing books that they determine to be "adult" content from their rankings and listing. so prudish and all, but okay, fine, be uptight.

the problem is in how they're determining adult. books like playboy (heterosexual sexuality is apparently fine for kids to see), books on things like dog fighting (disgusting, not to mention illegal), etc are not being excluded.

note that they're including young adult books in this "adult" category, if they have any queer or trans content. they're including any book with queer or trans content, regardless of whether or not the have sexual content. books on coming out to your family are among the ones that they are censoring. they're also including books on healthy sexuality (yet playboy is fine. wtf? talk about unhealthy ideas of bodies!) and erotica.

a direct quote from an e-mail sent to the author of one of the books included -
In consideration of our entire customer base, we exclude "adult" material from appearing in some searches and best seller lists. Since these lists are generated using sales ranks, adult materials must also be excluded from that feature.

Hence, if you have further questions, kindly write back to us.

Best regards,
Ashlyn D
Member Services
Amazon.com Advantage


there are lots of people writing about this a lot more eloquently than me, like tara, smart bitches trashy books, dear author.com, and mashable. there are open letters to amazon popping up - like this one and this one.

smart bitches trashy books has created a fabulous definition of Amazon Rank" and is asking that people link to it to help with Google-bombing.

search google for amazon fail or amazon rank, and you'll see tons more.

there is a petition to sign here, you can e-mail amazon, or call them - 1-800-201-7575 (they apparently need your full name and your e-mail address in order to register the complaint)

Friday, April 10, 2009

updates and goodies from the mail!

ohmygoodness, so behind!

i'm sorry for disappearing like that! i've definitely been trying to blog more often, but these last few weeks have pretty much sucked, healthwise. after a few weeks of actually feeling better for once, i started feeling crappy again, and it really threw me for a loop! it's funny how quickly we get used to things we like, and how long it takes us to get used to the things that we don't! after only a few weeks of feeling better, i had it in my head that i could do more, and that i had more energy, and so even though i felt so terrible this week, i still kept pushing myself. you'd think i'd know better by now!

this week was going to be my take it easy week, though it didn't end up quite as chill as i wanted it to be. i was really sore and tired and in a daze for a lot of it! i kept thinking of things to post about, and then by the time i had a chance to actually post, i was way too wiped out!

so i've got lots of things to update about, MSCEApril for one, and my adventures monday for another.

but before i get into them, let's talk about mail. i LOVE mail! this has been a really awesome mail week! i've received lots of swap goodies - two chunky houses, seven pendants from the pendant swap, a piece of my puzzle atc, and a fabric atc! that's just the swap stuff!

i also received lots of non-swap goodies!

a whole stack of loose embroidery patterns that i won for a whopping $0.99 on ebay! i can't wait to scan and organize these!
pile o' patterns!

a huge order of unmounted rubber stamps from purple onion design's overstock sale.
rubber stamps

3 awesome pins from the folks at yarnbombing.com. i'm so so impatient for their book to come out!
yarn bombing

and all these vintage deer, which i purchased from shara at http://www.mydealoftheday.blogspot.com/ . aren't they super cute?!
vintage deer!
i'd also found some locally, at this amazing cake decorating place, so now i have a TON of deer! my massage therapist said the other day "amy, i think you're the only person i know who has her own herd of plastic deer." gee, ya think!

wasn't that a fabulous mail week? i'm so sad that today's a holiday and i didn't get any mail!

Saturday, April 4, 2009

Image Transfer Towels - Tutorial!! (lots and lots of pics!)

you saw all the finished towels i posted yesterday, and that got your head spinning with ideas of what you'd put on your own towels, right?

these are super quick and easy to do, despite what my millions of pictures may lead you to believe! they're perfect for quick gifts or to add a pop of colour and individualism to a boring kitchen. and they're pretty low cost, using only a small amount of cotton and transfer paper for each towel. the towels themselves can often be found in dollar stores, and i watch the kitchen clearance section at department stores for great deals.


so here's how to make them!

stuff you'll need -
- tea towels, obviously. preshrink them, please!
- white cotton fabric. again, preshrink it!
- a printer
- iron on transfer paper for light coloured fabric (get the one that corresponds to your printer type)
- sewing machine and white thread
- iron and ironing board (or a towel on a table, that works too!)
- pins
- lint roller or packing tape


Step 1
step 1
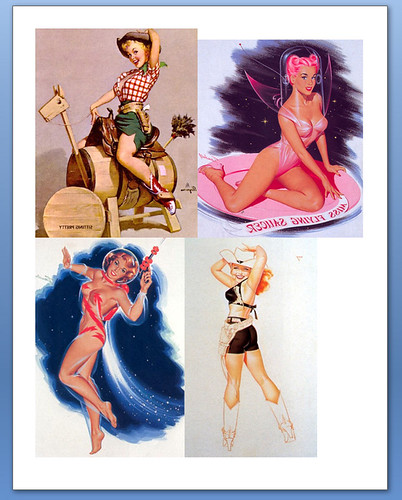
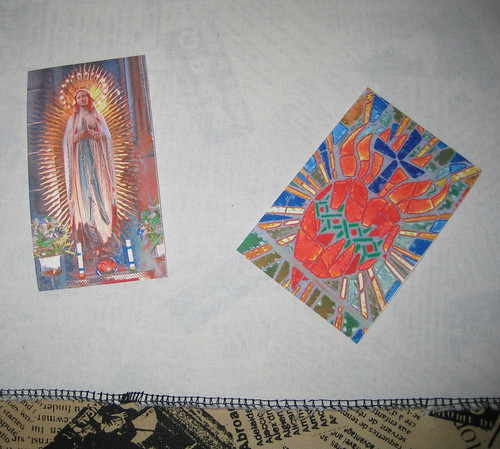
find your images, size them, and reverse them so that they'll transfer the right way (you may be able to skip this step now and do it when you print the page. i flip them in photoshop).

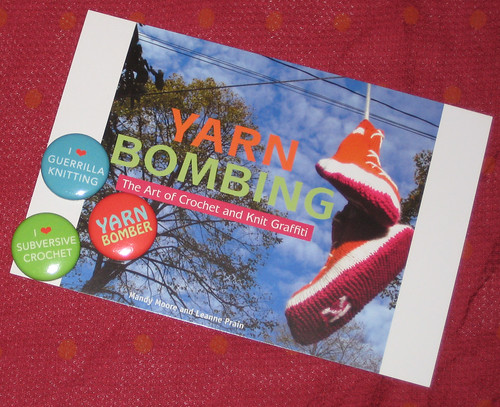
you can use any image you'd like, use google image search to look for pictures with a certain theme, use photographs you've taken, wander through flickr, scan in drawings you've done, or take advantage of the amazing clip art available on the wide wide web. i'm particularly fond of the digital stock art available from Urban Threads, any of them would make amazing towels! keep copyright in mind when choosing your images, which admittedly i didn't do for some of my earlier towels!

open a new document in Word and adjust your margins to make them as small as possible - this lets you fit bigger images on the transfer sheet!

import your images into the Word file and adjust the size. i like to fit 4 images onto each page, the images are the perfect size for tea towels. if your images are more horizontal than vertical, you will want to change the orientation of the page to landscape.
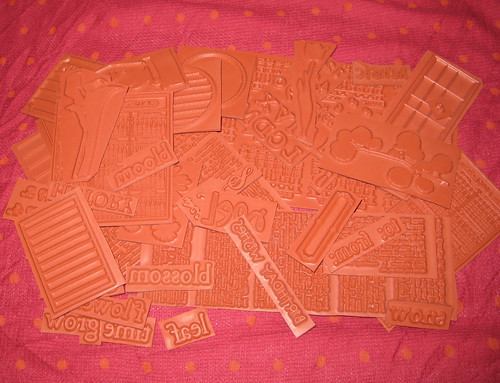
Step 2
step 2
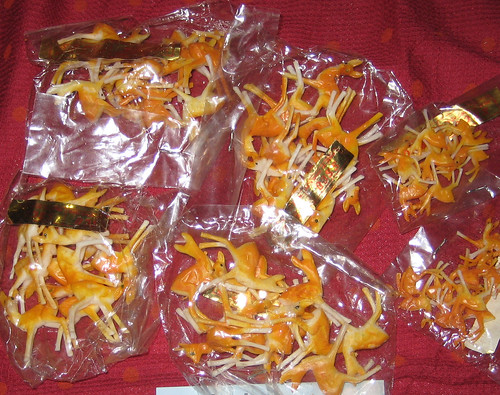
print the images out onto iron on transfer paper, following the instructions included with the transfer paper. there are a multitude of brands available when it comes to iron on transfer paper. i personally love Avery, i've had such good results with them over the years. keep in mind that they DO expire. i have a bad habit of continually losing half packs in my studio, and buying more instead of searching because "i'll use them eventually". the folks at Avery say that the sheets should stay good for up to 5 years, my experience is closer to 1 year!

for this example, i was only printing out 2 images, so rather than wasting the other half of the page, i made them a bit smaller than the images in the example above, and i placed them sideways on the page.
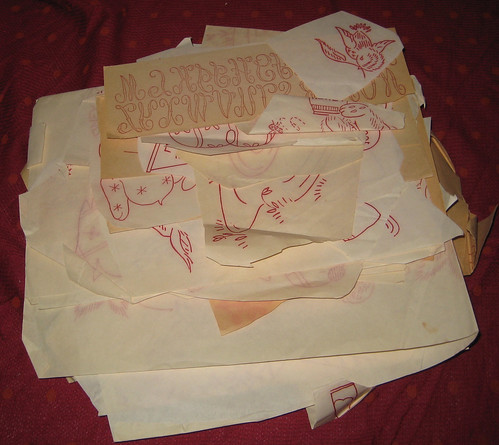
Step 3
step 3
carefully trim around the images and pull out your white cotton fabric. please DON'T buy your cotton fabric from somewhere like walmart! go to an actual quilt shop, and buy it there. it will be a little bit more expensive, but the quality will be SO much better, it's totally worth it in the long run. i have towels that i've had for years, washing them weekly in hot water, and they still look fabulous. i'm convinced that it's because i use a good quality fabric. the better quality cotton is smoother and more tightly woven than the cheap stuff, and the images transfer so much better.

Step 4
step 4
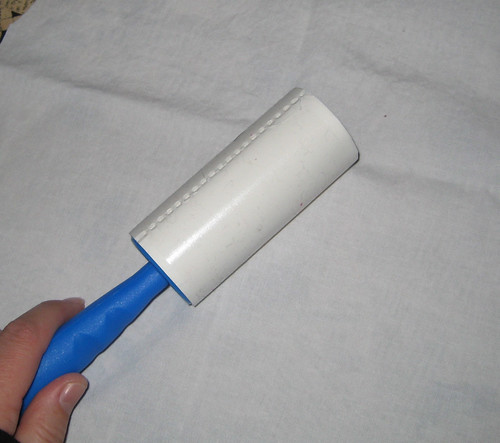
you need the fabric to be completely clear of fuzz when transferring images, so haul out your lint roller, or wrap some tape around your hand.

Step 5
step 5
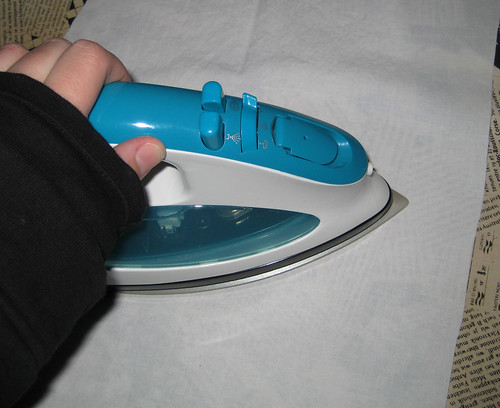
iron your cotton fabric to smooth out any wrinkles and to pre-heat the fabric. it'll accept the transfer better if it's already warm!
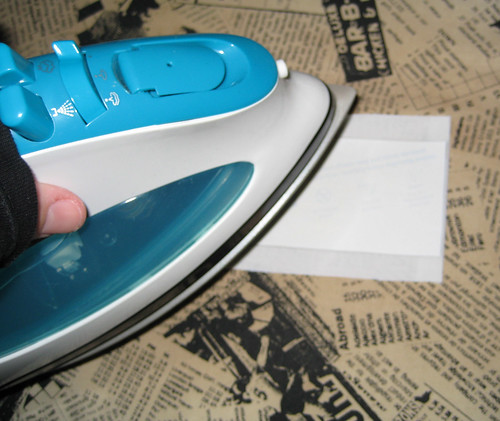
Step 6
step 6
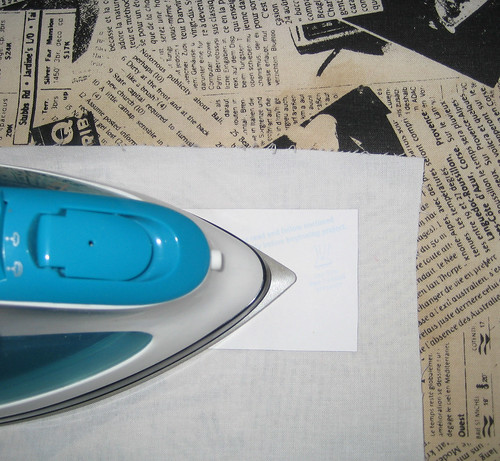
lay the transfer on your fabric and press it on. follow the instructions in the transfer package, which usually say something like "heat iron to hottest setting possible for fabric type. press transfer using a firm strong grip, moving iron over transfer smoothly" i find that i usually don't have to press the transfer for as long as the instructions say, because they're fairly small.
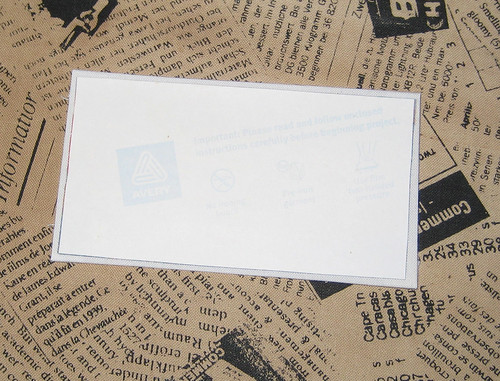
Step 7
step 7
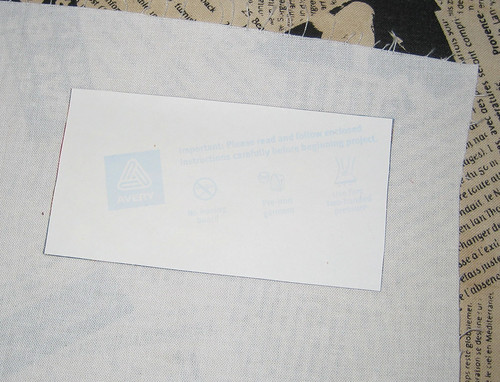
look closely, and you'll notice that the transfer bled a little bit around the edges of the paper backing. that's okay! actually, it's great! that's the sign i use to know when the image is fully transferred!

Step 8
step 8
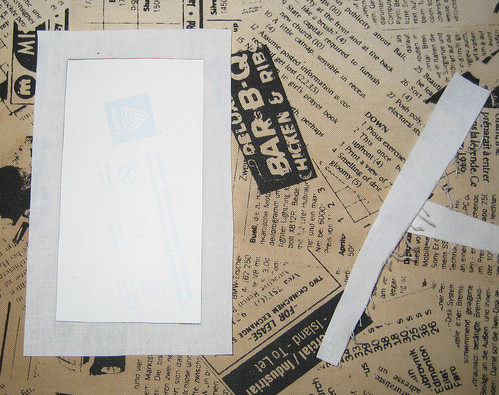
trim the cotton around your transfer. i usually leave about 3/4" around.

Step 9
step 9
now we're going to fold under the edges, leaving just a very very small amount of the fabric showing in the front. after lots of experimenting and very hot fingers, i've discovered the easiest way to do this! lay the transfer face down on the ironing board, then flip it up, keeping the edge face down.

Step 10
step 10
fold the edge over, bringing the transfer to lay face up on the ironing board. it sounds complicated to explain, but it's super easy!

Step 11
step 11
continue folding the edges over until you have pressed all 4 edges under. if one of your edges ends up a little crooked like mine did, just press it out flat and then try turning it under again. no worries!
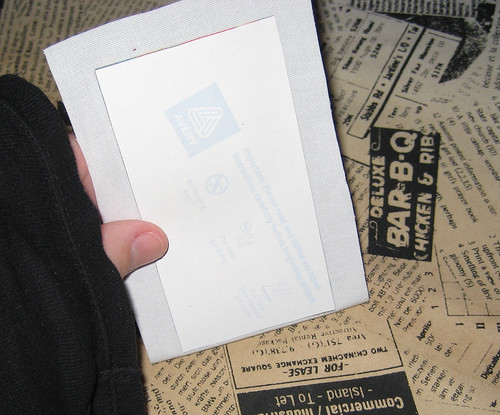
Step 12
step 12
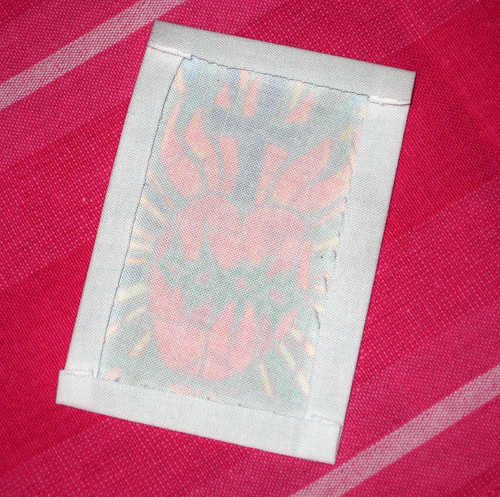
see? all folded under neatly! you can also see the transfer here, it will show through the backside of the fabric. now's a good time to take note of which is the top! you might want to put a little pencil mark there, so that you don't accidentally sew the transfer on upside down! (learn from my mistakes, okay?)

Step 13
step 13
press your tea towel to remove any wrinkles and fold it in half to determine the centre.
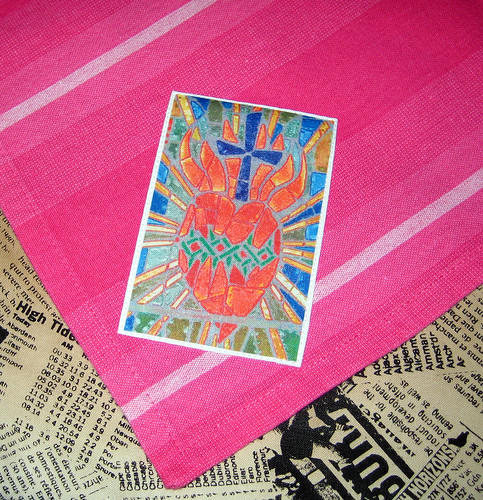
Step 14
step 14
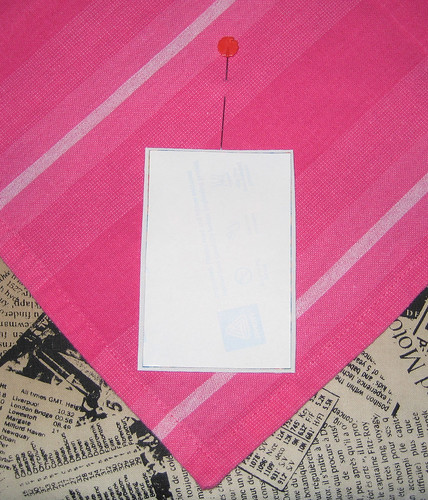
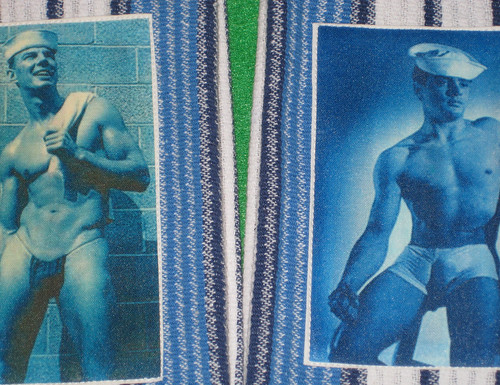
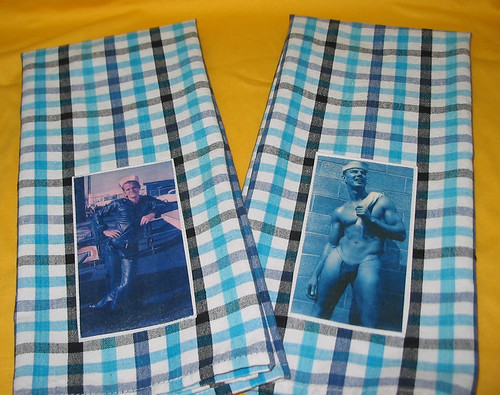
in my example i'm applying my transfer to the corner of the towel, but on the finished towels i posted yesterday, they're all applied in the centre. if your towel is a woven plaid, you're in luck, that makes things easier! if the weave is slightly off grain, feel free to apply your image following the weave, not the actual centre. trust me, it's a lot less obvious that way!
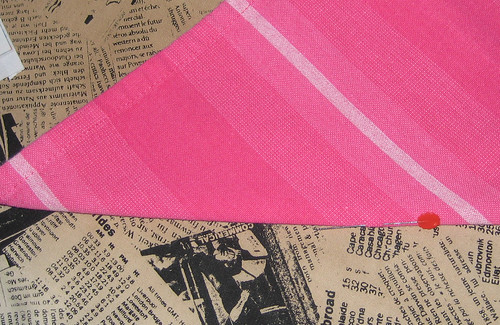
Step 15
step 15
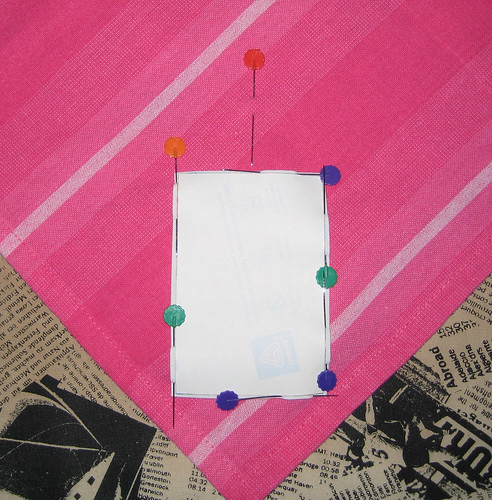
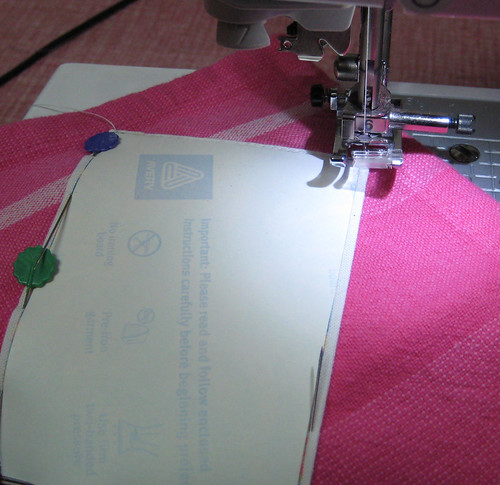
pin your transfer to the towel. don't put your pins directly through the transfer itself, slip them through the little white edge that we left. envision how you're going to sew the transfer on, and pin accordingly. i sew my transfers in a clockwise motion, so i always pin with the heads to the left so that i can easily pull them out when i get to them.

Step 16
step 16
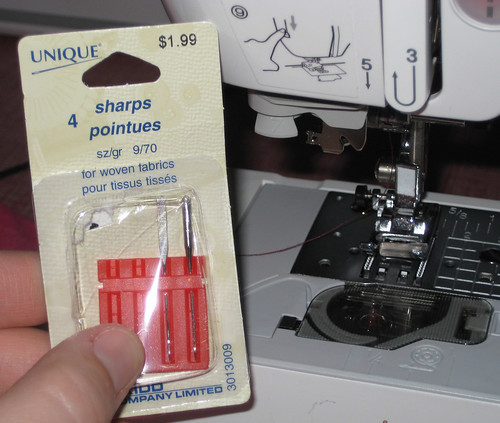
off to the sewing machine! load your machine up with white thread, and make sure you're using a new needle. because we're dealing with a fairly fine woven fabric, we'll be using a sharp needle as opposed to a ballpoint needle, and one in a fairly small size. like i said in the t-shirt sleeve tutorial, i think the sizes are different in the US, but you should still be able to tell which one is smallest!

Step 17
step 17
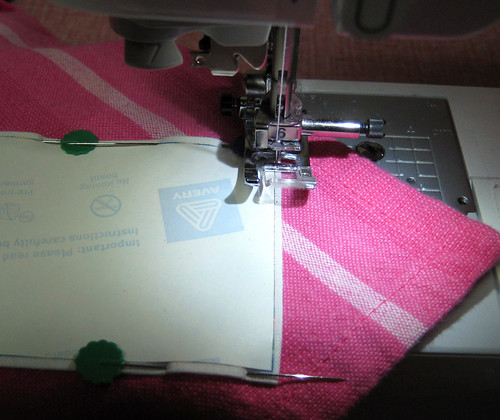
starting a corner, begin stitching around the edge of the transfer, only stitching in the little white edge we left when we pressed it.

Step 18
step 18
when you get to a corner, lower your needle, lift your presser foot and pivot!

Step 18b
detour (i'm helpin mom!)
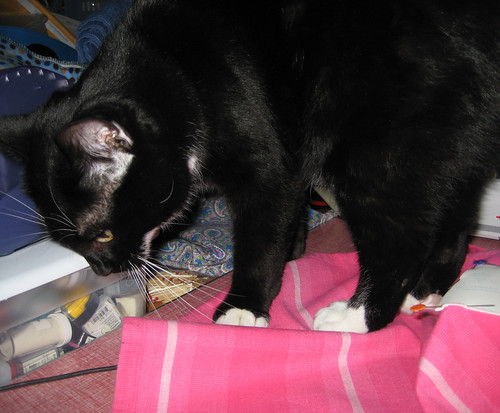
take a quick detour to pet the cat. she's trying to help, can't you tell? jeez mom!

Step 19
step 19
step 19b
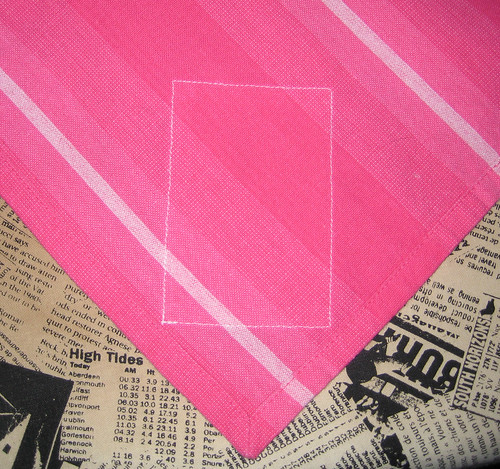
the transfer is now sewn on! because we used white thread on white fabric, the stitching is almost invisible and doesn't detract from the transfer at all. i prefer to use a white bobbin thread. if you try to match the bobbin thread with the towel colour and the tension on your machine is off even the slightest, the coloured bobbin thread can show through on the front. besides you'll rarely see the backside of your towel when it's hung anyway!
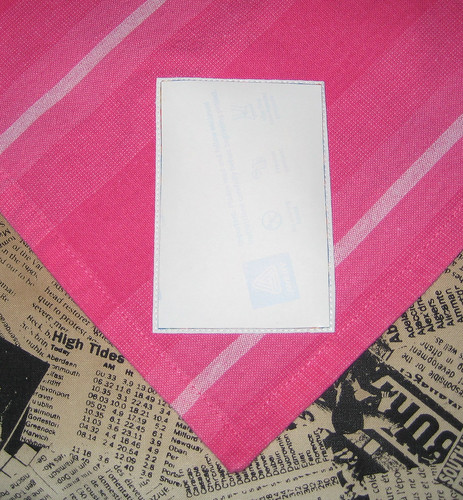
Step 20
step 20
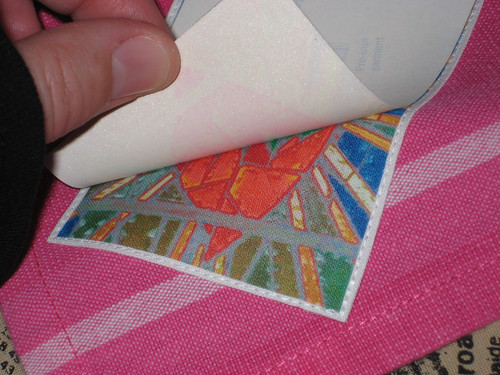
now give the transfer another quick press, because this will be the last time you'll be able to apply heat to it. starting with the corner, peel up the protective paper.

Step 21
step 21
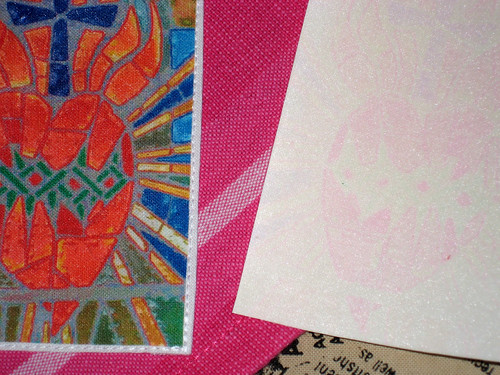
when you've got a good quality transfer, it will come off smoothly, and will leave a slight "ghost" image on the protective paper.

Step 22
done!
not really a step, because you're done! wasn't that easy? now go make more them!


i hope you liked the tutorial! i love comments, please let me know what you think, or if you make some, or what your ideas are for your own towels!

Friday, April 3, 2009

Image Transfer Towels - Finished Items!

one of my favourite things to make for quick birthday or housewarming gifts are these tea towels. they're super easy to make, and you can personalize them for the recipient by choosing photos that are relevant to them, or that match the decor of their kitchen.

i particularly love making towels using vintage erotic images. sometimes they're sexy, and sometimes they're hilarious. i made a set for Destined To Fail a month or two ago from craftster, in exchange for a silkscreened print that they made me, and it got me thinking about the towels again. i've made A LOT of sets over the years, and they're so easy, they're the perfect tutorial for Image April!

i'm going to split the tutorial and the finished products into two posts, because there are A LOT of pictures! today was an atrocious day (really. blegh!), so i'm going to do the second post tomorrow.


WARNING!! some of the towels have images that are NOT SAFE FOR WORK!


this is the set i made for Destined to Fail. aren't the sailor boys hotties?
IMG_7156
IMG_7158
i edited the images in photoshop to add the blue tone, before i printed them on iron on transfer paper.

i've made the boys before, mostly in sets of 4. i only sent 2 to Destined To Fail because i wasn't sure how they'd feel about nakedness!

this is the set of four that i made for my best friend a few years ago
jaydee's towels 2

jaydee's towels 1

i made these two pin up sets for a swap in the winter of 2005
space girl towels

cowgirl towels

this set was made for the first Fat Girl Swap on craftster.org, January 2006
fat girl towels
the artwork is by an artist that i LOVE, but right now i'm blanking on his name, which is so frustrating!

this set was made for a day of the dead/lady of guadalupe swap
guadalupe towels
(i made myself a set of these ones, and they've held up EXTREMELY well!)

and this set was made for a friend, using images that she provided to me
friends

old family photos

i also made a whole bunch of towels with tiki and hawaii themes to vend at a tiki event that my friend pam was involved with. i made these along with tiki themed vinyl pouches.

IMG_4444

IMG_4440

IMG_4436

IMG_4435

IMG_4431

IMG_4427

IMG_4426

IMG_4423

IMG_4420

IMG_4417
Related Posts with Thumbnails